Thursday, November 24, 2011

For the season of Thanks and Giving

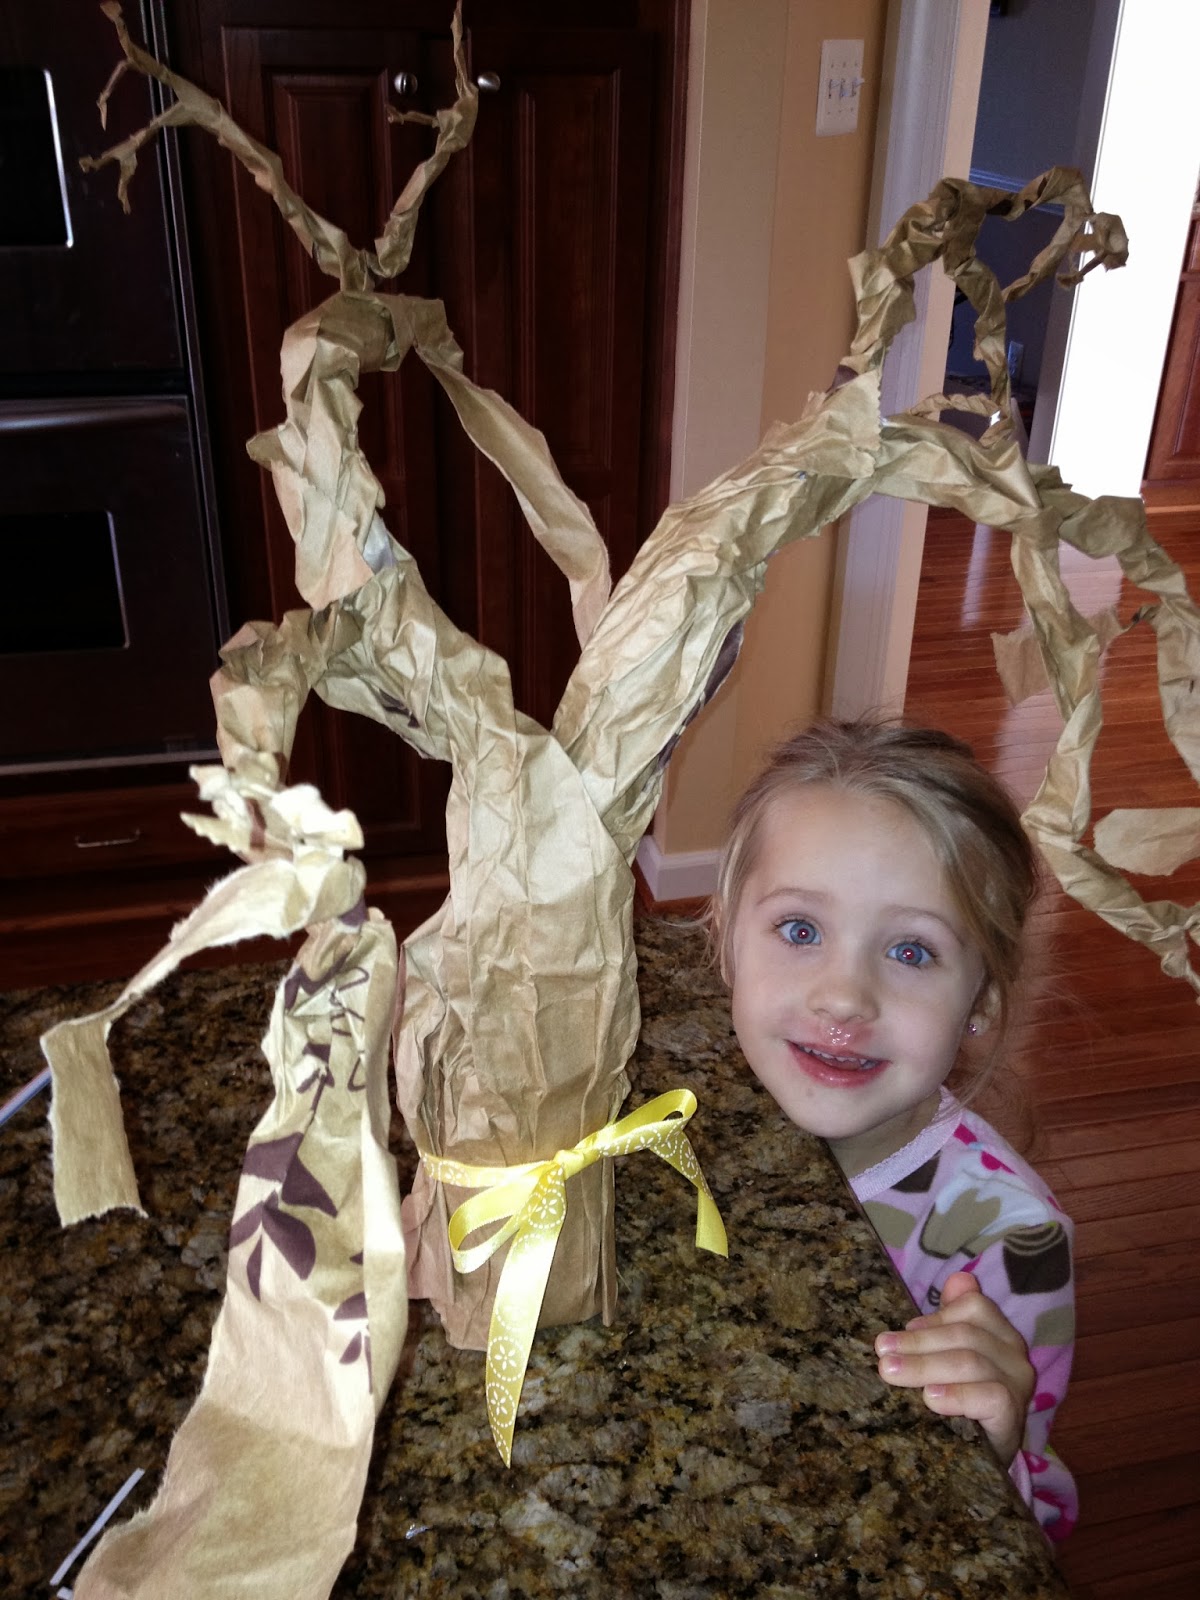
Our tree full of leaves and with  a yellow ribbon in honor of soldiers sailors and airmen still deployed.
This tree represents one of the most wonderful memories to be etched into my heart.

In order to bring a sense of gratitude to the Holidays I wanted to create something unique.  Since I had recently seen a "spooky tree" made from paper bags on the FamilyFun.com site for Halloween it popped into my mind that it might make a good gratitude tree. I decided to try it on a larger scale suing several large shopping bags.

This is our tree before the leaves...
Unfortunately a blog accident has left me with now pictures of the prcess so I'll try to describe as best I can how I made this tree. First I cut down one side of a large paper grocery bag then cut around the bottom to create a sigle flat piece. I tore this in two so that I had two long pieces to work with. For this tree I used two bags which gave me four longer pieces.(woohoo I found some iphone pics)

Next I taped the pieces overlapping to cover a sauce jar, I think Ragu pizza sauce but I could be mistaken. LOL Then, using a spray bottle of water I lightly misted the strips and twisted them around until I felt it looked right. It was a make it up as you go along kind project after all.
Here's how it started out:

 Then, using a spray bottle of water I lightly misted the strips and twisted them around until I felt it looked right. It was a make it up as you go along kind project after all.
 Next I decided the center needed some support so I grabbed a bit of everything in the kitchen drawer. I think what worked best was bamboo kitchen skewers for the center and straws for the limbs. You can't tell but they are inside there...and I just taped it all together the best I could with double sided tape inside some sections.

 After the trunk started to dry it became a bit more stable. The rest of the tree was simply created by dividing and twisting the four strips into two or three smaller sections over and over, allowing the tree to "branch out" and take shape.


The leaves were cut using my Cricut Expresssion, but I am not sure of the cartridge. Any simple leaf shape will do. I used several colors and sizes just for fun.

This last part is my favorite. :)

At first I was thinking the project turned out pretty but not as effective as hoped. I sat down with the girls and explained the idea of writing on the leaves and soon they thought of a few things and put a few leaves on. Well I wasn't overwhelmed with the initial response frankly and had hoped for better.

But after Thanksgiving dinner was all done and everyone was puttering around the house doing various things. I spied G (my intense middle child) in the dining room writing. I was so surprised when she told me she was filling in the tree! Slowly and quietly my other two girls joined us as we had a more heartfelt discussion and filled nearly every speck of the tree up. This was a moment a Mother lives for! Best day ever!

*Note:This is a rewrite of my original post which got accidentally deleted. :( Sorry to say this isn't as good a tale as the original but I still wanted to share this with my readers.

Sunday, October 9, 2011

Princess Party!

This smile is worth all the work!

It was my littlest daughter's first ever birthday party. She turned four and after watching her sister have parties she had quiet a wish list! It definitely had to be a princess party, with lots of pink. After planning out the cake, she saw this cake topper online and fell in love. Soon after however, she began to change her mind about so many of the details and it took plenty of talking to convince her she could not have a sleepover. She also decided she wanted cupcakes, but couldn't decide on chocolate or vanilla cake. So there was a compromise that worked out well. The cake was both chocolate and vanilla layers which I torted (cut into thinner layers after baking) in an effort to get more frosting into the cake and make DH happy too. There were going to be 9-10 kids plus the parents so I was happy with this option too.

 FOr the cake I used chocolate frosting instead of my traditional homemade chocolate ganache but I have to say. It really wasn't any easier and I had such a difficult time putting the fondant over it! For one thing the consistency stays the same throughout instead of the ganache which goes on soft and goey, allowing you to spead it well. But then Ganache hardens just right to make it easy to cover. Lesson learned! I didn't end up saving any time.
 The cupcakes were super easy but I couldn't find the right tip for the frosting and ended up just cutting a hole in my plastic bag and then topping with some edible silver glitter. :) My soses were super simple gumpaste. Just  a strip rolled and pinched at the end...the Wilton brand in the plastic bag is so nice to work with.
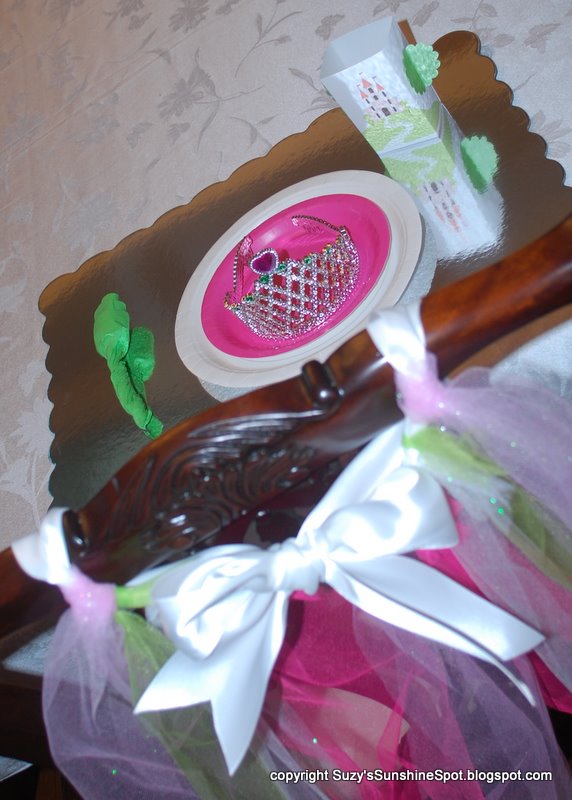
 After perusing blogs for a while I found an idea to make little take home skirts for the girls which doubled as chair decorations. It was super easy to simply tie the tulle strips onto the wide ribbon that I got from one of my favorite sites, Papermart.com. I literally buy hundreds of yards of ribbon at a time and this stuff is delightful!
 The young Prince who was invited got a shield cut with my cricut cutter from the Blackletter solutions cartridge with silver paper which is difficult to see. I used two loops of ribbon to make it easy to carry around and then tied it on as well.
 Her's the whole table I was able to lay out...
 Each guest sat down to a place mat which was actually a silver cake board. The crowns were from the dollar section at Target (what a find!) and even the prince got a handsome one. Then the plates were layed and my oldest daughter made paper "flowers" from the napkins. The castle box was actually a juice box holder with "handles" so that there were no spills from squeezing the drinks. :) I printed the images onto cardstock using a set of graphics from Lettering delights and used a punch to make scalloped circles.
 Thanks to an idea form a friend, I put some tulle in various colors tied to the ceiling. The kids loved the effect so much that my G wnts to do it for her party too. Hmmm somehow these things are getting more elaborate each time
 I was able to find a unicorn to make a poster for "place the horn on the unicorn" and it was so funny to watch them learn this new game....
And what is better than a simple white bag? Only one with a beautiful ribbon tied to it. So I broke out the good old standard and just put the goodies in with the wands peeking out and loved the basic look.

*Note: This is a rewrite of my original post which got accidentally deleted. :( Sorry to say this isn't as good a tale as the original but I still wanted to share this with my readers.

Saturday, October 1, 2011

Holiday Magic!

New Month New deals!
Close to My Hearts new Stamp of the month is in plenty of time to help us work our “Magic” for the Christmas Holidays!


This classic looking stamp set looks great with all the holiday papers you have now, plus the stocking will work with the Art Philosophy cartridge cut on page 67. How cute would that be?? 


Of course there’s also the new paper line “Believe” to create seven more magical designs for cards, gifts and pages:

 Of course Close To My Heart has another promotion for October:


                                                      ask me about joining my team!


 I can't wait to create with some of the new Workshop Kits so stay tuned for some fun fall projects! :)

Thanks for stopping by and adding your thoughts....

Blogaholic Designs”=