 |
| I think he's my favorite project!More below.... |
I did manage to snap a quick pic of the goodie bags LOL. These are the best thing since white paper lunch bags, clearly! Just maybe my new love...Inside are some cool tic tac toe mini games and some cute tissues B picked out. Both from the dollar section at Target. But the best thing of all you'll see in my next picture. Candy cane spoons! Everyone I gave them to, young and old went crazy fro them. I got them way ahead of time in mass quantities(we're talking free shipping) way ahead of Christmas since I knew they were a must have. Loving Oriental Trading Company this year!
So this is what I did with them....a mug with a coco package and a small baggie of mini marshmallows. If you look closely some of the mugs have snowman shaped ones from WalMart. The girls said the French Vanilla taste wasn't so good so I tried to give them mostly to adults though.
 |
| I am sharing the SVG file for this paper mug below.... |
We made coco cups for all the girls specials teachers(music, art, etc.) and the main teachers all got a mini bucket of extras too. I made a set of hand-warmers(same as last year but with real organic lavender oil) and a set of aloe infused spa socks as a cupcake...are you feeling the warm fuzzies yet?
Somehow K was recognized as the girl who gave out hand-warmers last year as gifts so her new teachers for this year got their own lavender and vanilla infused ones...the men got vanilla, and the one teacher who she had last year got another set his since wife took his. :) Sorry somehow no pics of those. Check last years post for some info if you'd like.
 |
| I make "the savages" help out. It's for their teachers, and then they are proud to deliver the gifts. |
But here's my favorite project of all so far....a few ornaments. I helped my daughter make a set of ornaments for our Girl Scout gift exchange. She made a set of Ravens ornaments and a Monogram one in the girls favorite color. They were a hit! Because we have an odd number of girls I exchanged with one of the girls and made a Ravens one, a monogram one and also this little snowman. He wasn't a complete success at first but after a happy accident he turned out sooo cute!
These are plastic ornaments swirled with Glitter it glue then we put in Martha Stewart's glitters. After that I cut out images and lettering from white vinyl using MTC to import and SVG. I should have used the wrap function in the program but instead snipped the image a bit to make it fit...next year huh?
 |
| For my little Ravens fan friends.. |
 |
| I need to make more of these!He swings around so nicely. |
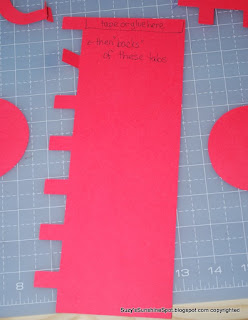
OK so here is my oh so simple mug file... I sized it so that the bottom was just shy of 3". It is way far from perfect. To make the mugs I folded the tabs in and started from the one right at the edge. Next I followed the curve just taping the tabs down to the circle using ATG tape and ending up overlapping the last and first tab a bit on the inside of the mug. Next I placed the second circle on the bottom of the mug to cover the tabs and give it some stability. The overlap f the paper is also to give it some strength. I used fairly ugly and plain Astrobrights cover stock left over from another project.
Here's a few step by step pics...I glued the handle together then spread the tabs to put them on the mug with Scotch quick dry glue. For next year I am thinking of making a slit to fit the tabs through.
SVG for mug on 4Shared
MTC for mug on 4Shared
*Or maybe these are my favorite project...hmmm decisions decisions...
 |


1 comment:
you've been a busy girl! LOVE everything you made but, really LOVE the ornaments!!!
Post a Comment