 |
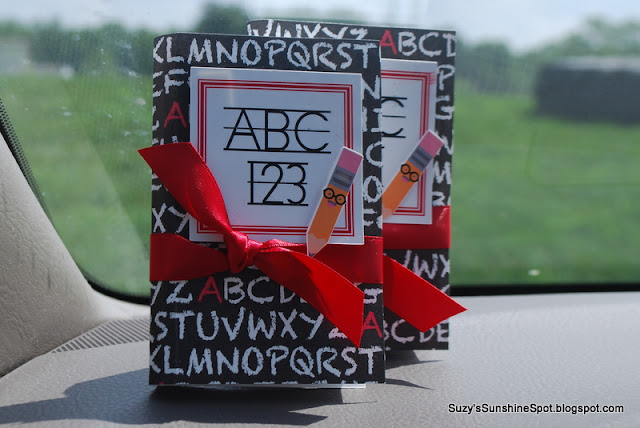
| Yes,, I took this picture in my car right be fore school LOL |
I was also happy to be able to make the simple 3D book gift card holder that is similar to the ones our committee made for the elementary school teacher appreciation week gifts. Those are shown in the previous post, and now I can include directions and possibly manage to attach the file for sharing too! :) I have to add that I was inspired to create this by the book files from SVGcuts.com and I do indeed own those files, But I wanted to create a file that was simple to make in mass quantities and sized for a gift card., so I created this file by putting together basic shapes.
For these gift card books I added some different decorations to the front. I hope they look like mini books...do they? My decorations on the front are a print and cut made with two Lettering Delights files. The font(LD Vertical trainer) wasn't looking good as it was imported into MTC directly so I started a word document and made the red outline box by creating a table of 1X1 and then changing the border. I placed the text into the "table" after I installed the font and simply typed in the text. Next I saved the file as a PDF right from Word and then imported it into MTC. I did have to change the color to red one imported but it looked great after that one simple step. The pencil is from the Pop School Graphics Set I believe. They have some great images!!! The last step before cutting was to created a shadow then do a simple print and cut. Look ho awesome the small pencil cut!!! I used dimensional tape to layer the pieces and finished it off with ribbon. (of course)
So now, in great detail I'll show you how I put this box together.....
The outer "cover" is cut at 6.25 X 4.5 inches and scored at 2.75 and 3.5 inches for a 1/2 inch "spine"
 |
| It'll make sense when you have your own in hand...promise. |
 |
| Sorry for the bad pic. :( |
 |
| this is just the rectangle glued to the bottom tabs...see the the half circles that are sticking up here? |
 |
| This is what the bottom will look like. |
 |
| This is the box bottom an the top cover ready to go. |
This is where it et's a bit tricky but only a little. You might have noticed that I left a "spine" of a half inch on the inside "box" and a "spine" of 3/4 inch on the outside cover. This is not an accident! The difference in sizes creates the rounded section common to real books. This is why you need to be careful in the next few steps.
Place the bottom of the "box" right up to the edge of the score mark representing the inside of the back of the cover. Press it down firmly and make sure it holds tight for the next step.
Place your adhesive for the top inside cover just inside of the tabs so that you leave space to tuck those tabs in later. Be sure side that will be up against the spine(on top here) has adhesive right at the edge.
Place the edge of the "box" up against the scored line on the cover so that the spine is formed with a rounded shape. I gently rounded the paper first by bending it around my finger before assembling mine. Press firmly so it stays in place.
 |
| The"tuck" |
 |
| Fully assembled, but not decorated... |
MTC file HERE
SVG file HERE and HERE for the pages...make sure the overall sizes are correct. The element that creates the pages should be 10" long. The dimensions are in the blog for the cover etc.


4 comments:
Suzy, this is a great project! Thank you for sharing the tutorial.
Thanks Michelle.I always hope someone out there can benefit from a stray idea or two I have. LOL... I need to get the files posted on here so everyone has the SVG's and the MTC file too. yikes!
What a great idea. I did 'Pin it' so others can see your creativity.
Thanks Marg for getting the word out! I am so happy to have the files on the website now!!
Post a Comment