Wednesday, October 31, 2012

Sonic Amy Rose Costume

This was a whole lot of work for this years costume! Somehow my daughter volunteered herself to dress as a Sonic character and show our hedgehog at the local conservation area...long story! But since she was going to wear this for an extended period, I wanted it to be good!

In some pictures Amy Rose is wearing all pink and red in others. But I was able to find a dress to alter at the local Good Will store. So our was pink! LOL

It started with a prom dress and an old dress up costume...

This hoop skirt was inside an old dress that has a broken zipper...

and I made it into a slip that fits short on my oldest and skims the floor on my youngest!
I started to take the dress apart before I took this picture....the top didn't have a white trim...I was just trying to conserve the fabric liner...

I made a pattern for the top and cut it out of the dresses bottom portion...
 It is certainly still a costume level of sewing but fun that I could do it!

Of course we made her hammer from paper using my Zing and MTC to create the end pieces to glue the whole thing together...
The MTC software will wrap the tab shape around the circle....then I cut a small hole in one of the red papers we wrapped around....it was about 10 inches around...and 12 inches wide. My daughter really enjoyed it!

Not to be outdone, my little ones want to show their costumes too! Kitty cats going to a party! These costumes were just what they wanted....I offered to make better ones. Promise.


Boo! gift crafts...

Our Halloween cat decided to get into the shot...LOL
Each year our neighbors sponsor a "Boo" exchange. It's becoming more popular so you've probably heard of it. In our neighborhood we keep it a secret, and ring and run...The little ones love it! And of course I have to try to make it a bit crafty....

There are three little girls and one boy in the family we Boo'ed so I put each of their "monograms" on their goodies since I know how the kids like to claim their own treats.
witches broom treat bags!
For the girls, I saw a "witches broom" idea on Martha Stewart's blog...it is simply two paper bags with the outer bag cut down to the base in strips. Then for the one boy in the family I put together a "warlocks cauldron". The rat held a little note that says:

Three little witches
and one warlock too

went out to play
and make some brew

but a storm came by
and the wind it blew

so they left their things
just for you!

OK so not the but "poetry" but we were in the beginnings of a hurricane LOL. And of course they got their own countdown to Halloween!

Happy Halloween everyone!!


Thursday, October 18, 2012

How many days to Halloween? *UPDATED*

Halloween is just around the corner and if you have a little one like mine, I have to give the countdown daily. My B lives form holiday to holiday with birthdays sprinkled in...so I had to devise something I could make to handle all this counting down!
 This was my first attempt and as you can see the boxes fit snug within the outer box....I ahd to fix it bx adjusting the file, but that was OK since I needed another for our other Halloween tradition of "BOOing" our neighbors. For the first calendar I made new boxes and then a new outer box a bit bigger for the second one.

I was able to make print and cut patterned papers with the Chillingsworth Manor digital paper collection from an Echo Park Digital kit I got from JessicaSprague.com. They have a Wednesday deal each week that makes it digital addictive!

For each of the back pieces I used different sets of SVG's. The top one was from LetteringDelights.com. Using the Simple shapes set from the vinyl decorations...LOL
 This one was made using the same difgital kit for the papers and then using SVG's from SVGcuts.com. I think the white contrasts too much and I need to soften it a bit with some inking or something, suggestions welcome!

This file needs some improvement and I also hope to come up with more styles for all year long...Believe me I will need a calendar for each event/holiday!!

Have a happy Halloween and check back for some more crafts soon!

UPDATE:
I was so grateful when I got the perfect solution in my comments, so I went ahead and put a moon behind the bat for a better look to the second calendar....love it! I used some shimmer spray and it looks really good IRL! Thanks CIndy@Scrap-obssesed.blogspot.com!

She has some really fun project there too and you should all check out her blog! I was so glad I did!

Tuesday, October 16, 2012

Halloween Crafts.....finally

I finally can post some of the projects I've made for Halloween, mostly vinyl since it was already out from the previous project, and it's fast and easy...
 These candles were made into pumpkin faces last year I believe but they are back as a haunted house scene this year. I used a Lettering Delights simple shapes set that is on sale until Nov 1st for 3$ I believe....
 Some more of these simple shapes since my oldest loves this project....
And her special candle....

All my three girls participated in putting this vinyl decoration together...it is right over the small table where they craft and even eat together.
Over several days, they added different elements. It was funny how much they knew about putting up vinyl from watching me. My 5 yo was a hoot!

My next two projects will be in their own post....Happy Halloween!

Tuesday, October 9, 2012

Monogram with vinyl on frame...

This is stunning IRL, you gotta make/have one!

OK so the title of this project doesn't even come close to describing the beautiful look of the finished product. I have to say I was seeing these vinyl on glass ideas for a while and then I had the good fortune to read a few posts on the MTC forum(thanks so much ladies) where they posted just this very idea. SO, when a friend needed a quick and inexpensive gift for a family wedding, I sorta steered her to this. What? I know you do it too. ;)

She is awesome at finding just the right thing and on sale so I sent her out to find a "floating frame" I was thinking of a wall hanging one but she found one at the local Ross's that had an easel back. This presented a really cool creative opportunity.

I was able to dry emboss a 5X7 piece of cardstock in the wedding colors and place it within the frame. It was a repetitive swirl that made it easy to put it through twice and get the whole 5X7 in two passes...

Next, the monogram and design went on top of the glass and creates a cool floating effect.... I used my Zing and MTC software to cut the "regal" font. I think it's one of the TTF installed automatically. I don't know why but it was just there....and everyone on the MTC forum has a version of the font that is cleaned up(meaning fixed so it cuts well) since several members shared their files. Very kind of them all but I ended up making a few alterations too. I split the H, put in the lines and added some text, and cleaned a bit more. Then Ta Da!

There is about a half inch between the top and then a second two pieces of glass. Let me tell you it is a nice effect. Go make one!

Monday, October 8, 2012

Cold stuff....

Of course I picked the coldest day yet of this fall to share this project with you...It's an old one I whipped up super quick for a birthday gift, in August.
 Cute Huh? It's an ice cream cone and a gift card holder! G's friend loves ice cream and chocolate in particular, so even though we didn't get her a gift certificate to the local ice cream place that we frequent, I did get her a cone. :) This is a file from SVGcuts.com and it goes together very easily. If you think you might have trouble, their website provides really good assembly videos. But the files themselves are always some of the best designs and easiest to cut and put together. They just work....
My "sprinkles"
Did you notice the cute sprinkles on top of the cone? And the shiny red cherry? I decided to break out one of my old supplies and used my Xyron to sticky both sides of the cherry so it would stick in place and so I could glitter the whole surface. It goes in once to coat the "back" then I send it through again to sticky the front while it's still on the paper. Then it super easy to coat with glitter....you end up with a glittery sticker. I used my Martha Stewart collection of fine glitter. SO pretty, I am sure you'll see more of it this fall and winter.

After the cherry I decided to use the little bits form my slot hole punch to make sprinkles. It's one of those simple one hand punches. And it was full of old scrap pieces I always forget to empty out, so I just tipped it into the Xyron and crossed my fingers. What came out was a bit gooey and clummpy but hey, don't sprinkles always look like that? ;) I was pretty happy with the outcome and ran out the door since of course I made this last minute.

Next I'll catch up one some fall stuff....promise. :)

Sunday, July 29, 2012

Get ready for some cuteness!

Look what we got after we decided to stay in town? I have to say I seriously love these two kittens we adopted. They were at a local vets office since they were so ick when they came to the shelter. It was our lucky day when we stopped by to see them. The kittens were at the vets for their entire lives getting loved and petted by the entire staff and a slew of visitors. That made them so sweet! And yes we had to get two. Daddy couldn't resist his three girls all ganging up on him! LOL

 This is Princess Yuki, or Yuki for short. Any girl kitty we got had to be Princes somebody in order to appease our youngest.
 And here is her brother Othello, the Black Moor, named after the Shakespearean character. Guess who picked that? ;) But there is a compromise at this house and we call him by his chill gangsta name O-Lo kinda like J-Lo. I good with that since it really fits.
 I love how much my girls love them.
 B literally giggles with happiness.
 G is loving snuggling and petting them as well as playing...
 K can pick up any kitty at any time and they melt for her....
 She is cuteness come to life!


Chillin

He is super chill....

Seriously....

And he loves the camera luckily!

 Yuki, not so much....

And yeah, they own the place already...

But, I love how much joy they have brought to my family almost as much as I love and enjoy them individually....

Don't worry Coco we still love you too!!!

Saturday, July 28, 2012

June Birthdays 2012 style


Soooooo.....I never really said what has been keeping me form my crafty and blogging fun but our family had faced some big (but good)choices for 2012. We had several opportunities up in the air for my husbands job and we thought we'd be moving. at one point it was Idaho, Califonia or London. But we ended up staying here. :)

But before we knew our decision we had a lot of preparation to do......which meant low key parties for my two girls...my oldest daughter is moving back into parties where boys are invited again...argh! But she as even simpler tastes now. In fact she wouldn't even let me make a card in an envelope for her invitation so the compromise was a single piece of card stock decorated and with an announcement of her party that she could hand out. What's a crafty mom to do? New for this year was a simpler cake as well... So I made a banner for the cake, simple tags for the goodie bags and chauffeured teenagers back and fort for a skating party....they also had a chocolate fountain and played Kinect dance games and watched a movie...phew I was tired!
Here some of the stuff before I got it all out my savages wanted to start! At least I can show this since I don't have permission to post the other kids...and the dancing fun.
My younger daughter did allow me to send some invites through the mail so I made good use of a super cute Harajuku Party set of graphics from Lettering Delights in Photoshop to print these cute invites. She let me make some tags for simple goodie buckets which contained fun dollar store goodies for some summer fun....as you can see it was still a busy night and we had lots of fun, even if I didn't get to make a ton of decorations...

The graphics are super easy to put together in Photoshop and print out so nicely
Customized in Photoshop...drag and drop. Easy Peasy!
Tags using cut and print after they were customized in Photoshop using the LD graphics set.
 Silver stars were also part of the party theme for the slumber party so we decorated with a few (gasp) store bought decorations and sprinkled some on the the cupcakes. I fumbled my way through making some chocolate crusting butter-cream frosting for the cupcakes with a super jumbo one on top.....it was filled with Nutella for the birthday girl. And, a fun time was had by all. :) We skated, had pizza, a chocolate fountain again, and then did dance games and watched a movie....hmmm sound familiar? ;)
Fun but simple cupcakes, with a giant one on top....

Teacher Appreciation Gifts-Part II

Somehow my teacher gifts for the week from my daughter to her teachers was deleted or never posted and that is a shame since I wanted to share a couple of cute projects. Even though our committee made all the other treats, I made a point of trying to send in something each day so that my own daughter wouldn't be left out of the tradition at the school. My youngest sent in some gifts too so as not to leave her preschool teachers unappreciated!
 This was a super simple way to package up some office/school supplies using a fun graphic from Lettering Delights. It is a graphic set that I print and cut using my Zing and then I created a border to make it pop from the bag. My daughter was so thrilled and proud when her teachr peeled it off and put it on her board!
 Next was flowers so it was just a simple run to the garden and a print and cut created with MakeThe Cut and my Zing. The tag file is awesome(from SVGCuts.com) since the hole is actually sized well to fit the ribbon through! The flowers were the teachers favorite colors...lucky me. :)
 Yummy cookies for the teacher....
 So what goes better than cookies and milk? This is a super cute file from Lettering Delights also.  The cut-it set included the graphics and the file to create the "milk carton" I created another decoration for the sides using the cookies from the graphic set for a bit extra something.


The last days gift was a super fun one that I hope to recreate again...A simple set of bookplates! I used a matchbox file from SVGcuts.com to create the container then using sticker paper and some .png files from a graphics set, I made a few custom book plates that I print and cut to fit inside.

Thanks for stopping by!

Thursday, May 24, 2012

Teacher's Gifts- The end of the year...

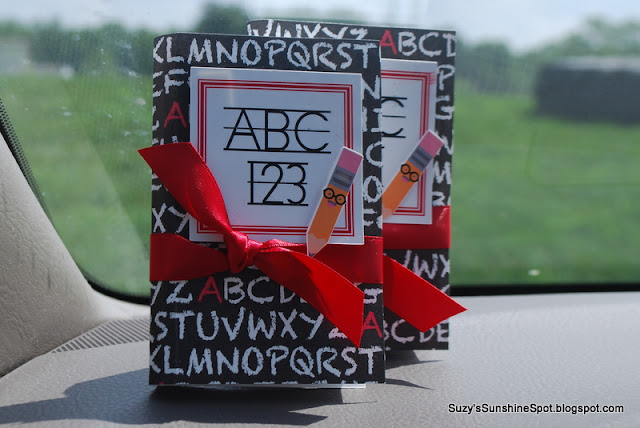
Yes,, I took this picture in my car right be fore school LOL
This year my youngest started preschool and I wanted to thank her first ever teachers for the great job they did. Conversations with my daughter didn't lead me to anything really good for them, so we settled on several gift cards. B couldn't decide. She wanted to give them a million dollars((lottery tickets) and also her favorite, pink donuts (Dunkin gift card). Plus she decided a dinner out would be great since donuts aren't healthy (Applebee's gift card) and also some good books to read (Barnes and Noble's gift card). Luckily it didn't add up to too much since I was able to get a multipack to slit up.

I was also happy to be able to make the simple 3D book gift card holder that is similar to the ones our committee made for the elementary school teacher appreciation week gifts. Those are shown in the previous post, and now I can include directions and possibly manage to attach the file for sharing too! :) I have to add that I was inspired to create this by the book files from SVGcuts.com and I do indeed own those files, But I wanted to create a file that was simple to make in mass quantities and sized for a gift card., so I created this file by putting together basic shapes.

For these gift card books I added some different decorations to the front. I hope they look like mini books...do they? My decorations on the front are a print and cut made with two Lettering Delights files. The font(LD Vertical trainer) wasn't looking good as it was imported into MTC directly so I started a word document and made the red outline box by creating a table of 1X1 and then changing the border. I placed the text into the "table" after I installed the font and simply typed in the text. Next I saved the file as a PDF right from Word and then imported it into MTC. I did have to change the color to red one imported but it looked great after that one simple step. The pencil is from the Pop School Graphics Set I believe. They have some great images!!! The last step before cutting was to created a shadow then do a simple print and cut. Look ho awesome the small pencil cut!!!  I used dimensional tape to layer the pieces and finished it off with ribbon. (of course)

So now, in great detail I'll show you how I put this box together.....

The outer "cover" is cut at 6.25 X 4.5 inches and scored at 2.75 and 3.5 inches for a 1/2 inch "spine"

It'll make sense when you have your own in hand...promise.
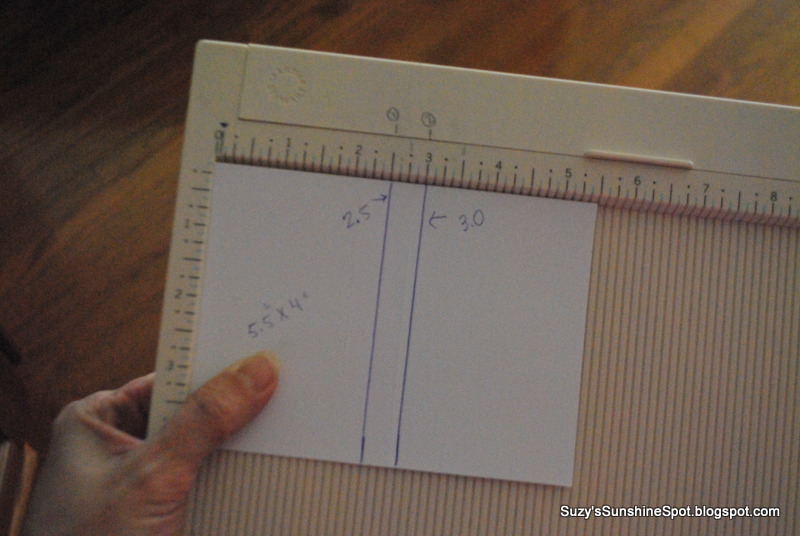
This is the piece included in the file. Simply fold at the score marks to make a start of the "box" that represents the pages. The half circles fold in to help close the whole book at the very end and there is a bottom and some side tabs. You'll need to glue a rectangle into this after folding it all into shape. The rectangle should be 5.5 X 4 inches and scored at2.5 and 3.0 inches.
Sorry for the bad pic. :(
After you fold all the pieces a the score lines, simply glue it together to form your inside box...
this is just the rectangle glued to the bottom tabs...see the the half circles that are sticking up here?
 You want this to fit exactly into the corners nice and snug!

This is what the bottom will look like.
 See the rectangle tabs sticking out? These need to be glued to the sides of the rectangle as you fold it into shape.
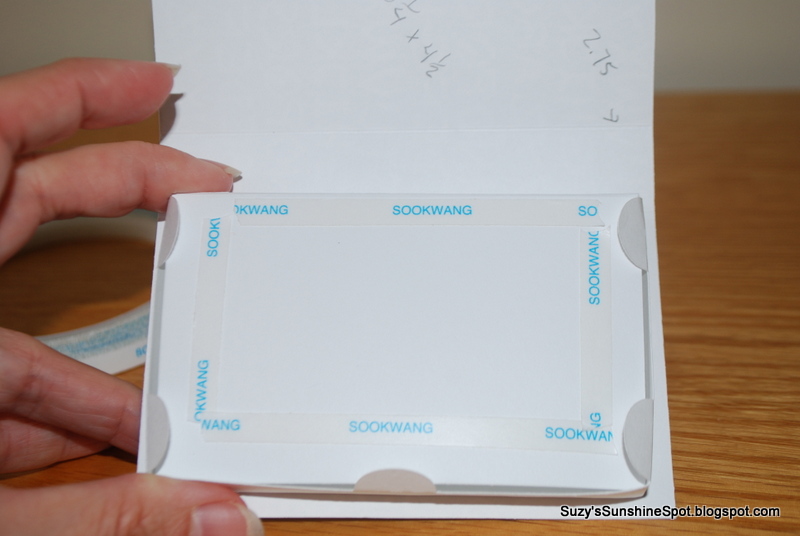
This is the box bottom an the top cover ready to go.
Place some strong adhesive along the edges of the bottom. Be sure to put adhesive very close to the edge on the side that goes up against the books "spine"

This is where it et's a bit tricky but only a little. You might have noticed that I left a "spine" of a half inch on the inside "box" and a "spine" of 3/4 inch on the outside cover. This is not an accident! The difference in sizes creates the rounded section common to real books. This is why you need to be careful in the next few steps.


Place the bottom of the "box" right up to the edge of the score mark representing the inside of the back of the cover. Press it down firmly and make sure it holds tight for the next step.


Place your adhesive for the top inside cover just inside of the tabs so that you leave space to tuck those tabs in later. Be sure side that will be up against the spine(on top here) has adhesive right at the edge.

Place the edge of the "box" up against the scored line on the cover so that the spine is formed with a rounded shape. I gently rounded the paper first by bending it around my finger before assembling mine. Press firmly so it stays in place.
The"tuck"

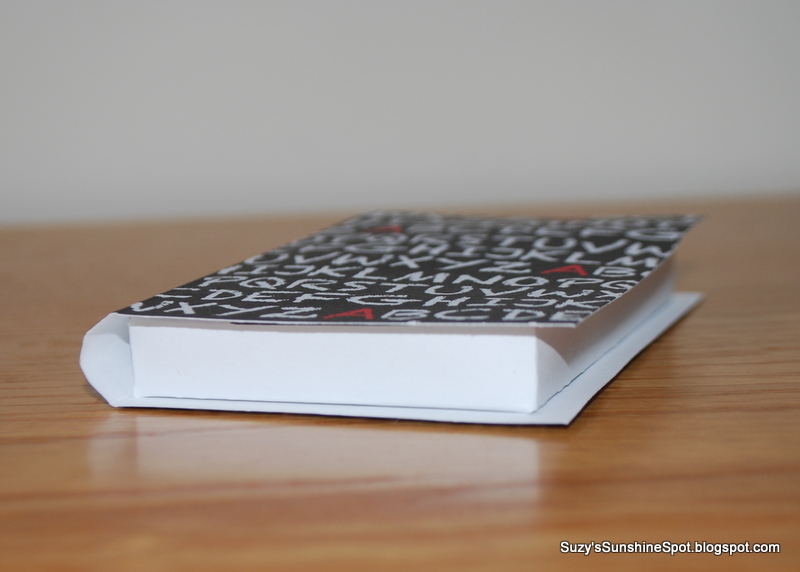
Fully assembled, but not decorated...
Tuck the tabs into the top cover once you have your gift cards inside and Viola! A 3D book that's a gift card holder!!

MTC file HERE
SVG file HERE and HERE for the pages...make sure the overall sizes are correct. The element that creates the pages should be 10" long. The dimensions are in the blog for the cover etc.

Thanks for stopping by and adding your thoughts....

Blogaholic Designs”=